At Family Law Software, we are introducing a new File Manager in the Cloud app, which simplifies the way you work with client files and gives capabilities that you did not have before.
The current anticipated release date is December 20, 2024.
Key benefits include:
- Now there is a single list for all files.
- You will be able to share files with your client after you enter data in them.
- You will be able to give access to people other than your client.
Click here to view a video introduction, or keep reading below.
One List of Files
The first thing you will notice when you open the new File Manager is that, at the top, there is no longer a heading for shared files.
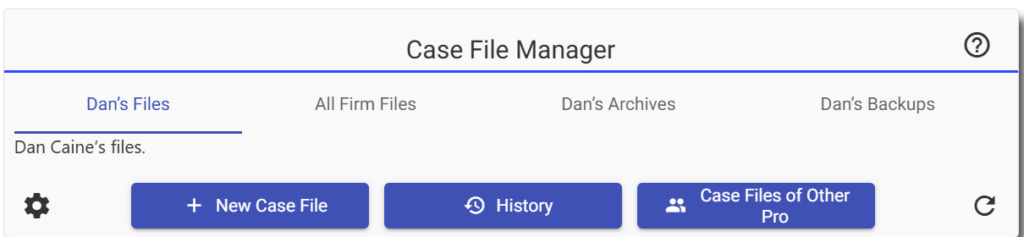
All the client files that you have opened will now be listed in a single list with your professional files.
Granting Access to Your Clients
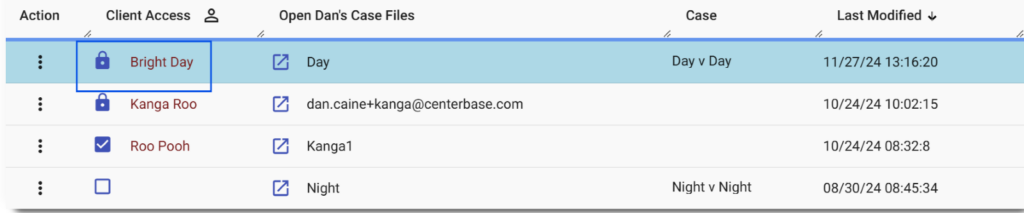
In the File Manager, you will see a new column labeled “Client Access.”
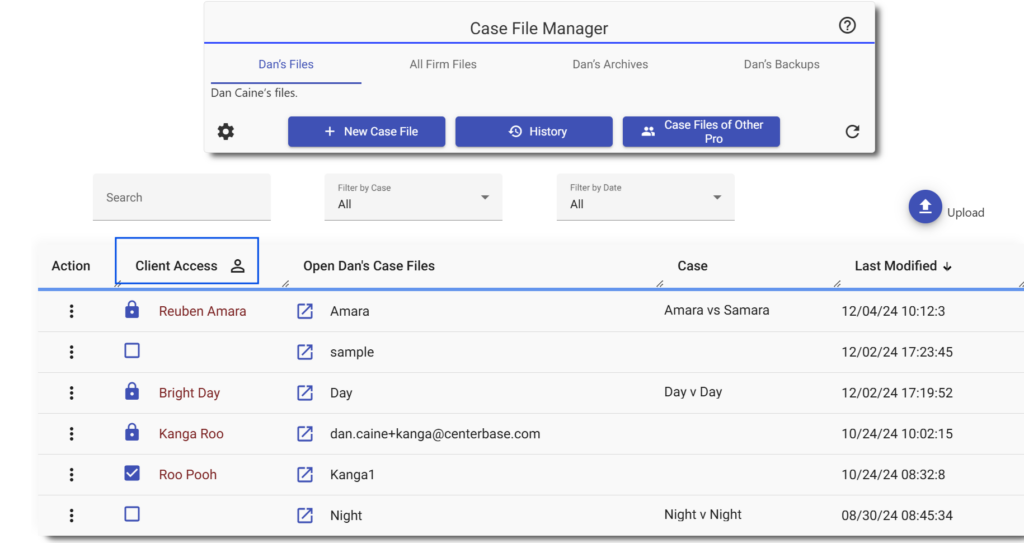
Note the check box in the client access column.
- If it is blank, that means only users in your office have access.
- If there is a checkmark symbol, it means that the client has access now.
- If there is a lock symbol, it means that a client was granted access, but you have locked the client out, so only you can access the file at this moment
A new file will always start with a blank checkbox.
To grant access to a client, just click in the checkbox.
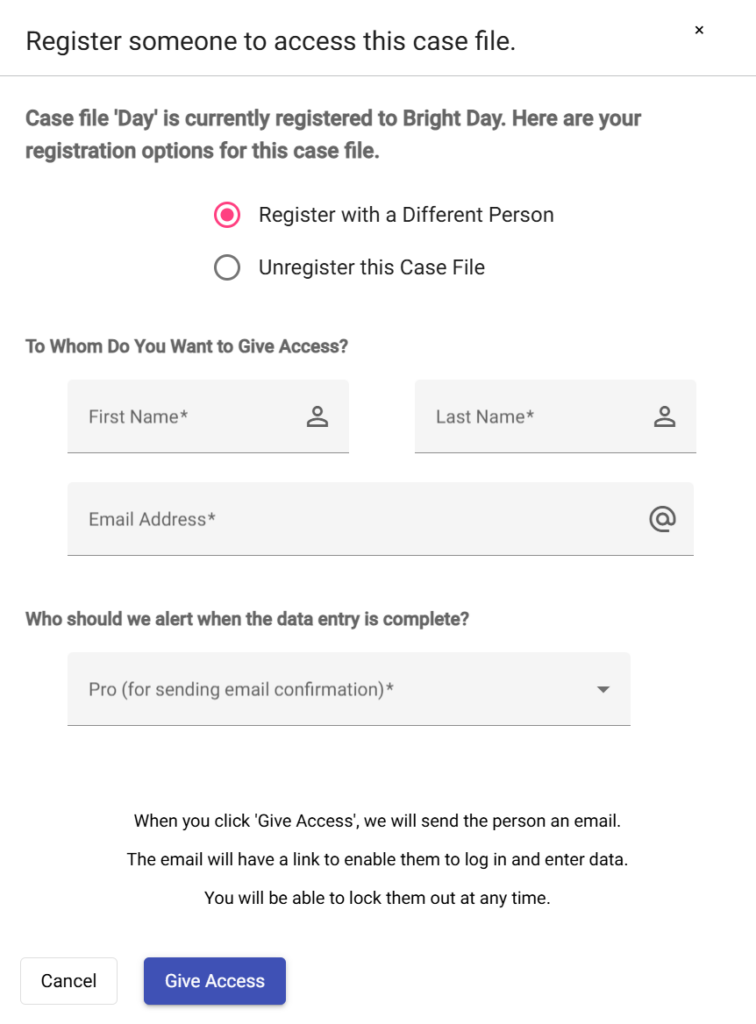
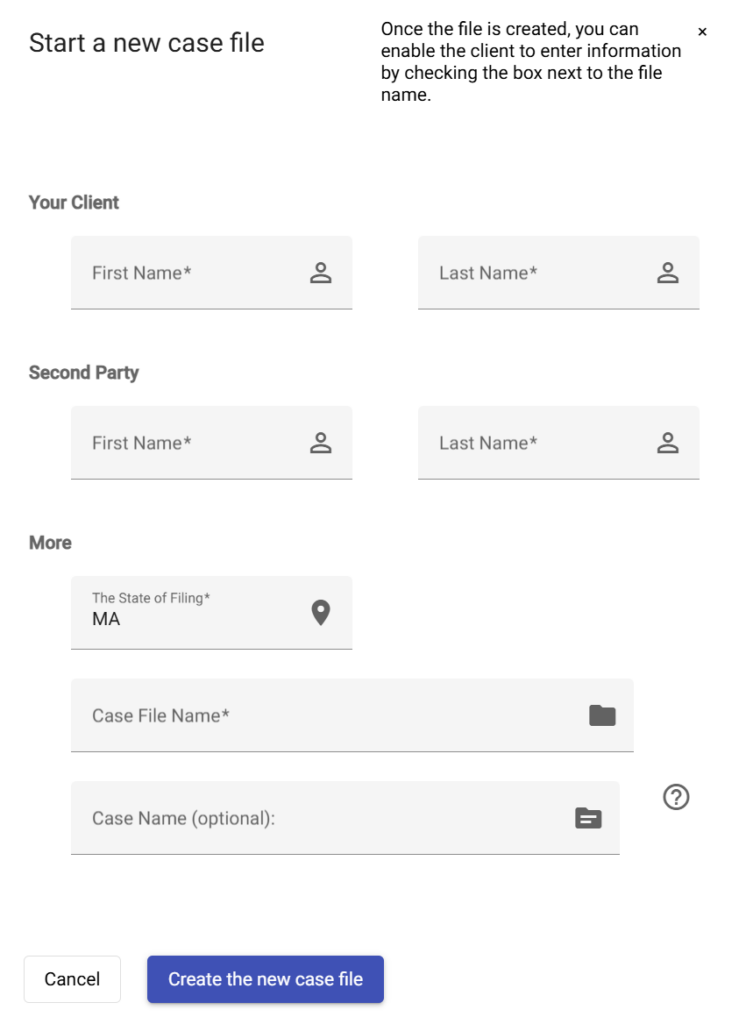
You will see a short form to fill out, shown below, where you indicate the client’s name and email address.
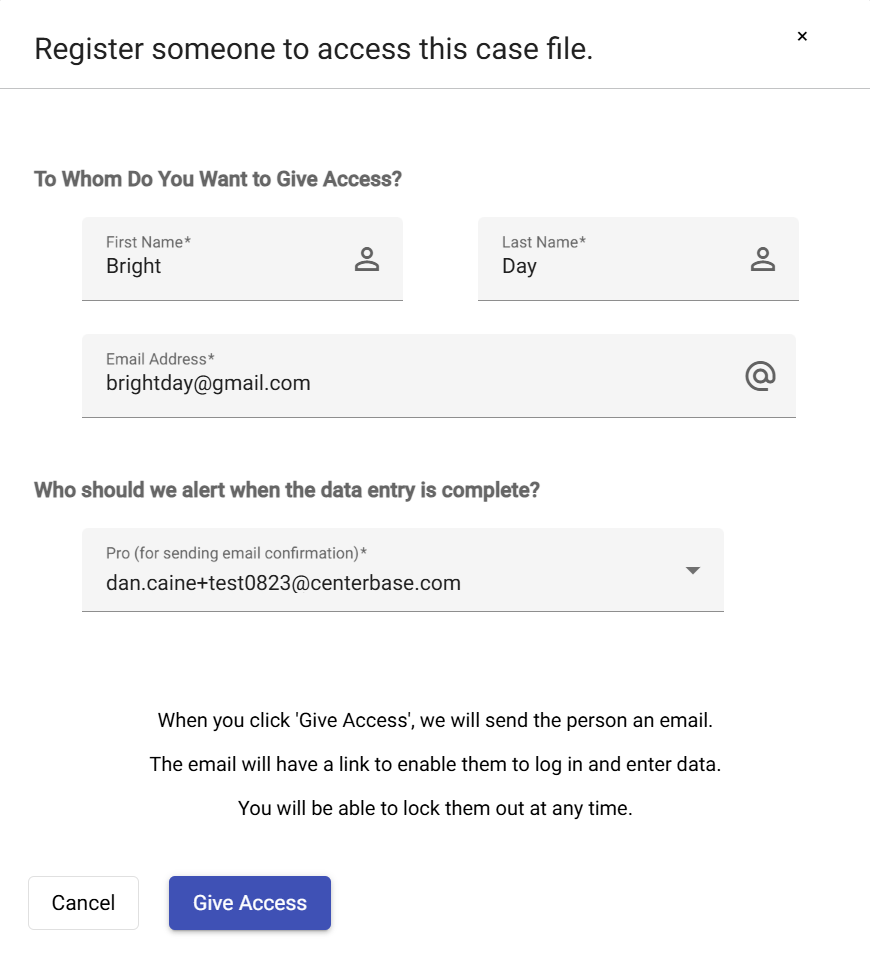
You also can specify which professional should receive the confirmation email information when the client logs in. This is useful if you wish a paralegal to receive the confirmation information. (You will need the Firm Edition of the software in order to enable paralegals to be eligible for this feature.)
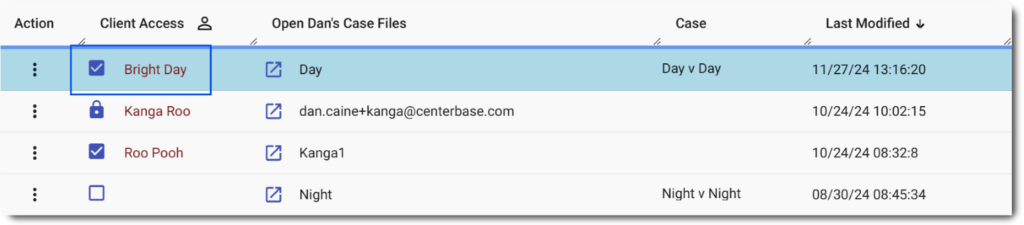
When you click give access, you will see a confirmation dialog, and when you return to the list, the access checkbox will be checked for that client.
The client will then receive an email enabling the client to register and enter their information.
Locking the File
At any point, if you wish to lock the client out just click on the checkbox again.
Then, the check box will have the lock symbol, and the client will not be able to enter their information further in the file until you unlock it.
If you wish to enable the client to enter data again, just click on the checkbox again.
If you click the check box again, that will unlock it and grant the client access again. The symbol will revert to the checkbox symbol, indicating that the client is able to log in and enter their data.

Giving Access to Others
A nice feature of client access is that you can also give access to someone other than the client, although only one other person at a time.
For example, you might want to give access to a financial planner who is working with the client.
In mediation cases, you might want to give access to the other party.
And in collaborative cases you might want to give access to the other attorney.
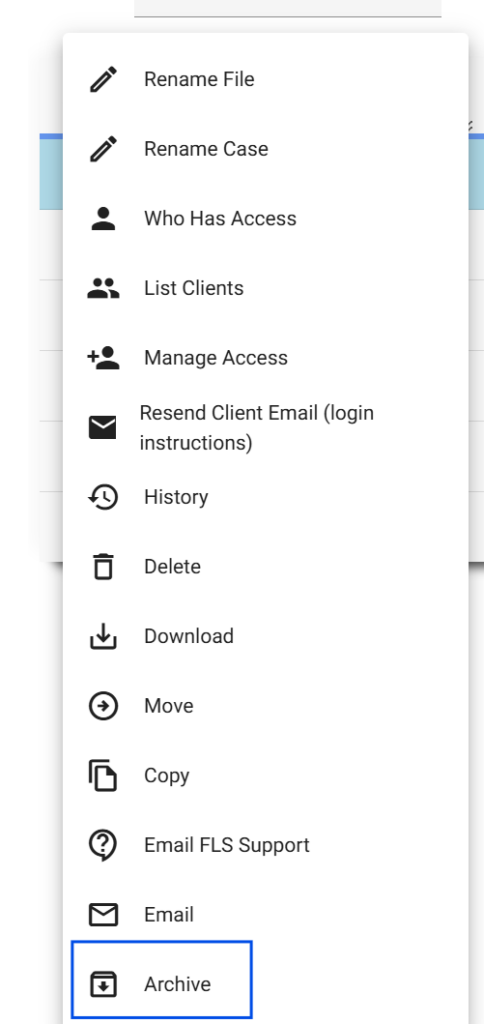
To give access to another person, click the three dots button on the line where the file is listed, and then select Manage Access.
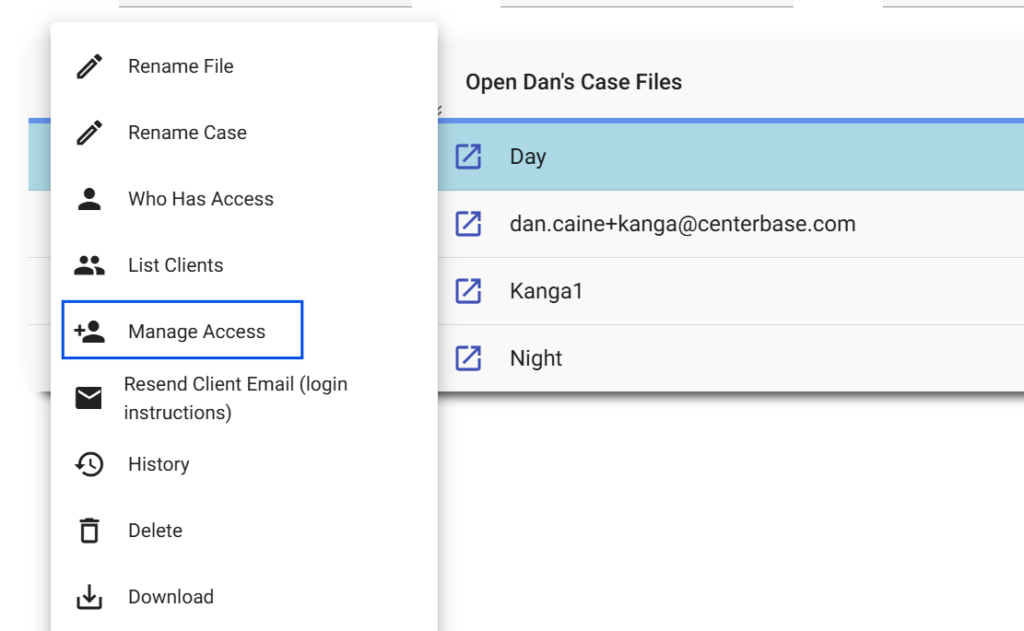
At that point, you have an option to specify another person to have access to the file, or to unregister the file so that no one has access.
“Who Has Access” and “Resend Invitation”
There are several options on the three dots menu and two of them are particularly relevant to the new File Manager.
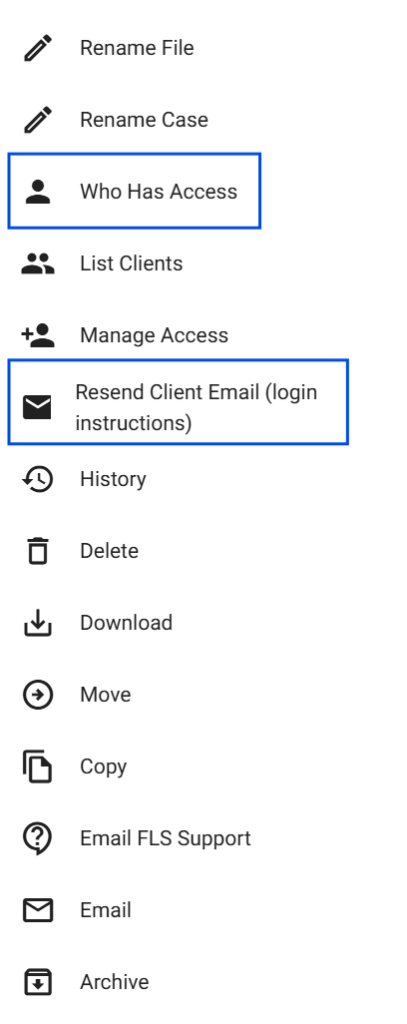
First, if you forget who currently has access to the file, you can simply select the option labeled Who Has Access.
Second, if the client has lost their registration email you can simply send it again, by selecting Resend Client Email.
New Files
So far in this blog, we have seen how to work with the File Manager for existing files. But what about new files?
Creating and sharing new files is simple and flexible.
You can create a new file, enter some data in it yourself, and then share it with the client.
To create a new file, click the New Case File button.
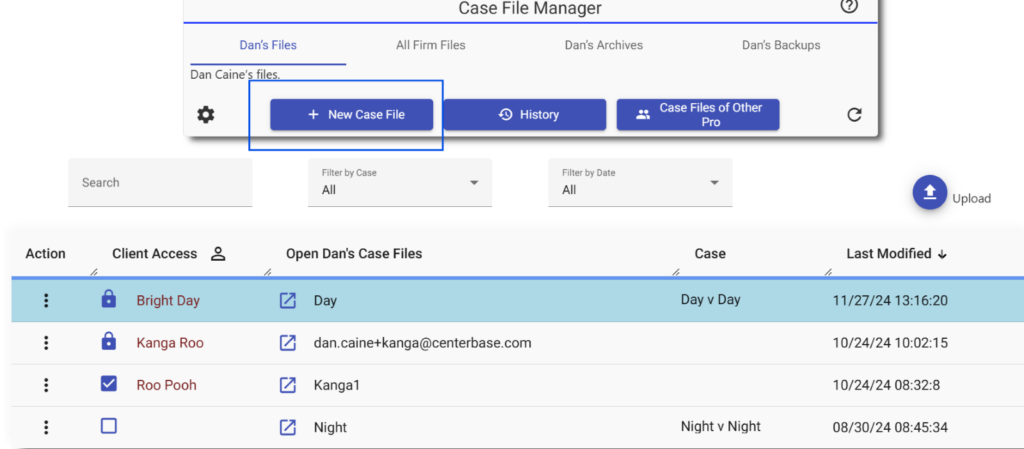
A dialog will pop up asking for file information.
Complete that dialog, and the new file will be created.
You can now open the file and enter data in it.
When you are ready, you can return to the File Manager and grant access to the client.
Or, you can create the file and grant access to the client immediately, so that the client starts with a blank slate.
Upload and Download from Desktop Software
What if you are using the desktop software to upload and download files?
If you are using the desktop software to upload and download files it will basically continue to work as before.
If a file is currently accessible by the client, you would use the button to download a client file. Otherwise, you would use the button to download one of your files.
Auto-Archive of Old Files
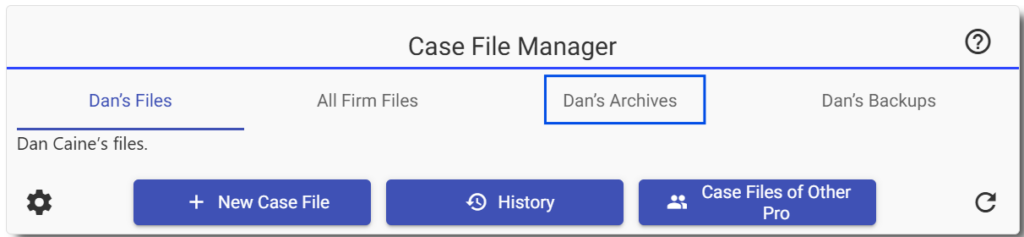
The first time the new File Manager starts, it will move files that are older than a year to your archive list.
You can access your archived files by clicking the tab for archives at the top of the File Manager.
At any time, you can move any file you like from your main list to your archive list by clicking the 3-dots button for the file and selecting Archive.
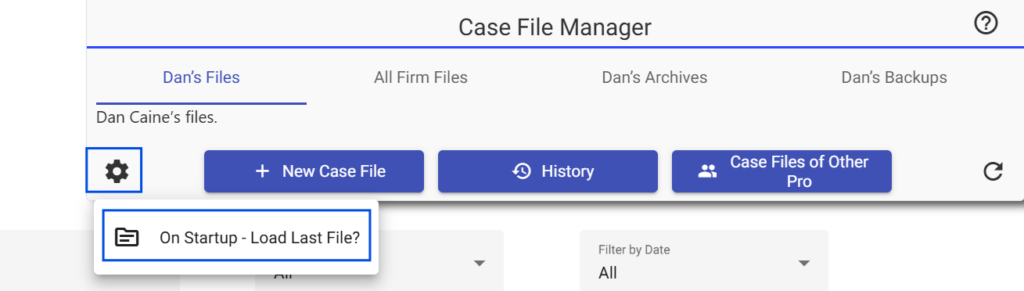
File List at Startup
With the new File Manager, when you enter the software, you will be taken directly to your list of files.
If you want to change that, you can click the settings gear, and then click the option to load the last file upon startup.
A Better File Manager
As we have seen in this post, the new File Manager in Family Law Software is a better way of working with client files.
- All files are listed in a single column.
- You can start new files and then give the client access later.
- And you can give access to people other than your client.